前面已经在Maven构建的项目中运行了第一个Junit5测试用例,本篇主要记录学习测试用例的写法。
测试类和方法 Test Class: 任何顶级类,静态的成员类,内部类必须包含至少一个测试方法,并且这个测试方法不能是抽象的 且只能有一个构造器
Test Method: 任何实例的方法都可以直接注解或者被元注解包含@Test @RepeatedTest @ParameterizedTest @TestFactory @TestTemplate 后面会对这些一一说到。
Lifecycle Method: 和测试方法一样,生命周期方法包含的注解有 @BeforeAll @AfterAll @BeforeEach @AfterEach
测试方法和生命周期方法不需要声明在测试类本身,也可以在父类或者接口上,测试方法和测试类不可以有返回值 ,并且不能是私有的方法
一个标准的测试类
1
2
3
4
5
6
7
8
9
10
11
12
13
14
15
16
17
18
19
20
21
22
23
24
25
26
27
28
29
30
31
32
33
34
35
36
37
38
39
40
41
42
43
44
45
46
47
48
49
50
import static org.junit.jupiter.api.Assertions.fail;import static org.junit.jupiter.api.Assumptions.assumeTrue;import org.junit.jupiter.api.AfterAll;import org.junit.jupiter.api.AfterEach;import org.junit.jupiter.api.BeforeAll;import org.junit.jupiter.api.BeforeEach;import org.junit.jupiter.api.Disabled;import org.junit.jupiter.api.Test;class StandardTests @BeforeAll static void initAll () } @BeforeEach void init () } @Test void succeedingTest () } @Test void failingTest () fail("a failing test" ); } @Test @Disabled ("for demonstration purposes" ) void skippedTest () } @Test void abortedTest () assumeTrue("abc" .contains("Z" )); fail("test should have been aborted" ); } @AfterEach void tearDown () } @AfterAll static void tearDownAll () } }
需要注意的是:
@BeforeAll和@AfterAll修饰的是静态方法@BeforeAll和@BeforeEach的最大的区别在于运行该测试类,前者只会执行一次,后者对于每个测试方法测试前都会执行一次。After*同理内部类方法不用@BeforeAll和@AfterAll修饰,原因是内部类不能包含静态方法
显示名生成器 测试类或者测试方法通过@DisplayName修饰可以自定义report显示的名称,复杂的名称生成器通过@DisplayNameGeneration来实现
1
2
3
4
5
6
@DisplayNameGeneration (IndicativeSentences.class)class xxx static class IndicativeSentences extends DisplayNameGenerator .ReplaceUnderscores ... }
断言 和Junit4相比, 一些断言方法里支持了函数参数,这个函数是Supplier, 所有的断言方法都在类org.junit.jupiter.api.Assertions里面
fail()
assertTrue()
assertFalse()
assertNull()
assertNotNull()
assertEquals()
assertNotEquals()
assertArrayEquals()
assertIterableEquals()
assertLinesMatch()
assertSame()
assertNotSame()
assertAll()
assertThrows()
assertDoesNotThrows()
assertTimeout()
assertTimeoutPreemptively()
算上方法重载有点多。。没有逐个去测试了
第三方断言库,后面再看
假定 关于假定和断言的区别见参考,最大的区别在于假定失败不会影响到整个测试类其它测试方法的执行,而断言失败则会导致整个测试类失败。
所有的Assumptions包含在org.junit.jupiter.api.Assumptions类中
禁用测试 对于某些测试类或者测试方法需要暂停执行测试可以通过@Disabled("Disabled until bug #99 has been fixed")修饰,可以作用在类(包含内部类)和方法(各种方法)上
测试运行条件 简单来说就是为测试用例的执行添加前置条件,如果条件满足则执行,条件不满足则跳过不执行。
Operating System Conditions 在类或者方法上添加@EnabledOnOs(OS.MAC)或@DisabledOnOs
Java Runtime Environment Conditions 在类或者方法上添加@EnabledOnJre({ JAVA_9, JAVA_10 }) 或 @DisabledOnJre(JAVA_9)
System Property Conditions 1 2 3 4 5 6 7 8 9 10 11 @Test @EnabledIfSystemProperty (named = "os.arch" , matches = ".*64.*" )void onlyOn64BitArchitectures () } @Test @DisabledIfSystemProperty (named = "ci-server" , matches = "true" )void notOnCiServer () }
Environment Variable Conditions 1 2 3 4 5 6 7 8 9 10 11 @Test @EnabledIfEnvironmentVariable (named = "ENV" , matches = "staging-server" )void onlyOnStagingServer () } @Test @DisabledIfEnvironmentVariable (named = "ENV" , matches = ".*development.*" )void notOnDeveloperWorkstation () }
Script-based Conditions 示例
需要注意的是这个api还处于实验阶段
测试方法执行顺序 这里是用来控制测试类中多个测试方法的执行顺序
1 2 3 4 5 6 7 8 9 10 11 12 13 14 15 16 17 18 19 20 21 22 23 24 25 26 27 import org.junit.jupiter.api.MethodOrderer.OrderAnnotation;import org.junit.jupiter.api.Order;import org.junit.jupiter.api.Test;import org.junit.jupiter.api.TestMethodOrder;@TestMethodOrder (OrderAnnotation.class) class OrderedTestsDemo @Test @Order (1 ) void nullValues () } @Test @Order (2 ) void emptyValues () } @Test @Order (3 ) void validValues () } }
添加 @TestMethodOrder注解并制定排序方式,上面的例子用的是Order注解
添加 @Order(1) 声明执行的顺序
除了OrderAnnotation外还有Alphanumeric和Random
内部类测试 @Nested注解作用在内部类上来表达内部类的测试
1 2 3 4 5 6 7 8 9 10 11 12 13 14 15 16 17 18 19 20 21 22 23 24 25 26 27 28 29 30 31 32 33 34 35 36 37 38 39 40 41 42 43 44 45 46 47 48 49 50 51 52 53 54 55 56 57 58 59 60 61 62 63 64 65 66 67 68 69 70 71 72 73 74 75 76 77 78 79 80 81 82 83 84 import static org.junit.jupiter.api.Assertions.assertEquals;import static org.junit.jupiter.api.Assertions.assertFalse;import static org.junit.jupiter.api.Assertions.assertThrows;import static org.junit.jupiter.api.Assertions.assertTrue;import java.util.EmptyStackException;import java.util.Stack;import org.junit.jupiter.api.BeforeEach;import org.junit.jupiter.api.DisplayName;import org.junit.jupiter.api.Nested;import org.junit.jupiter.api.Test;@DisplayName ("A stack" )class TestingAStackDemo Stack<Object> stack; @Test @DisplayName ("is instantiated with new Stack()" ) void isInstantiatedWithNew () new Stack<>(); } @Nested @DisplayName ("when new" ) class WhenNew @BeforeEach void createNewStack () stack = new Stack<>(); } @Test @DisplayName ("is empty" ) void isEmpty () assertTrue(stack.isEmpty()); } @Test @DisplayName ("throws EmptyStackException when popped" ) void throwsExceptionWhenPopped () assertThrows(EmptyStackException.class, stack::pop); } @Test @DisplayName ("throws EmptyStackException when peeked" ) void throwsExceptionWhenPeeked () assertThrows(EmptyStackException.class, stack::peek); } @Nested @DisplayName ("after pushing an element" ) class AfterPushing String anElement = "an element" ; @BeforeEach void pushAnElement () stack.push(anElement); } @Test @DisplayName ("it is no longer empty" ) void isNotEmpty () assertFalse(stack.isEmpty()); } @Test @DisplayName ("returns the element when popped and is empty" ) void returnElementWhenPopped () assertEquals(anElement, stack.pop()); assertTrue(stack.isEmpty()); } @Test @DisplayName ("returns the element when peeked but remains not empty" ) void returnElementWhenPeeked () assertEquals(anElement, stack.peek()); assertFalse(stack.isEmpty()); } } } }
需要注意的是,测试方法的声明周期
依赖注入 意思就是测试类的构造方法或者测试方法可以运行过程中,自动被注入对象,目前,JUnit内置类3类对象的自动注入。
TestInfo
1
2
3
4
5
6
7
8
9
10
11
12
13
14
15
16
17
TestInfoDemo(TestInfo testInfo) { assertEquals("TestInfo Demo" , testInfo.getDisplayName()); } @BeforeEach void init (TestInfo testInfo) String displayName = testInfo.getDisplayName(); assertTrue(displayName.equals("TEST 1" ) || displayName.equals("test2()" )); } @Test @DisplayName ("TEST 1" )@Tag ("my-tag" )void test1 (TestInfo testInfo) assertEquals("TEST 1" , testInfo.getDisplayName()); assertTrue(testInfo.getTags().contains("my-tag" )); }
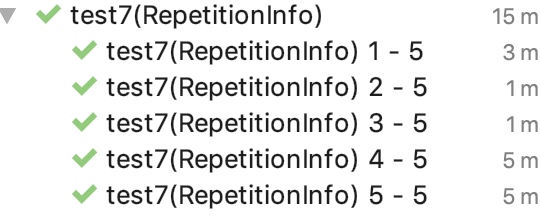
RepetitionInfo: 获取重复执行时,当前执行次数与总次数等信息
TestReporter
暂时没想到使用场景,另外可以自定义,更多的参考文档。
重复测试 JUnit提供了对一个测试方法重复测试的能力,emmm,你不用写for循环来回执行
1
2
3
4
@RepeatedTest (value = 10 , name = "{displayName} {currentRepetition} -{totalRepetitions}" )void repeatedTest () }
需要注意的是上述@RepeatedTest注解属性name里面有几个变量,可以自定义Report
参考 1. 假设机制(Assumption)的优点


